Using Veeam Agents with Xen Orchestra(Vates XCP-NG and XenServer)
Purpose
This article documents how to use Veeam Agent for Microsoft Windows and Veeam Agent for Linux, managed by Veeam Backup & Replication, to protect virtual machines in XenServer and XCP-NG environments that are managed by Xen Orchestra. While these hypervisors are not directly supported for VM-level interaction by Veeam Backup & Replication, this article demonstrates how protection is possible through guest OS-level backup agents.
Xen Orchestra is a management application that provides a graphical web interface and CLI to manage XenServer and XCP-NG environments. This application works as a centralized management plane to control and monitor hosts and clusters, storage, networking, images, and virtual machines.
Solution
Backups
Veeam Agent for Microsoft Windows and Veeam Agent for Linux are components of the Veeam Data Platform that can be used to protect Windows and Linux computers that run on bare-metal hardware or virtualization platforms (including where a native host-based integration isn’t available).
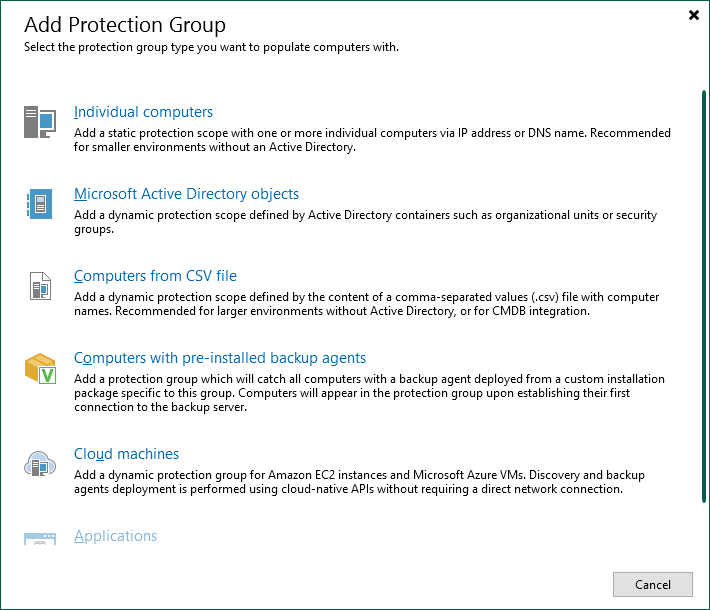
Protection groups can be used to deploy and manage agents on these VMs. Protection groups come in the following types:

-
Adding machines individually — Used to add a handful of machines.
-
Integration with Microsoft Active Directory — Allows you to target AD objects (OUs/Computers/Failover Clusters/Groups)
-
A list of computers in a CSV file — This option can be paired with inventory management/monitoring platforms or scripts to get a list of VMs from a hypervisor platform.
-
Computers with Pre-installed Backup Agents — Create a deployment package that can be paired with device management or automation tools such as SCCM and Ansible/Chef/Puppet
More information on Protection Groups can be found in the user guide here: Creating Protection Groups - Veeam Agent Management Guide.
More information on Creating and Managing Backup Jobs and Policies for Veeam Agents can be found here: Working with Veeam Agent Backup Jobs and Policies - Veeam Agent Management Guide.
Enhanced Backup Management using Xen Orchestra scripts
Xen Orchestra has a CLI that can be installed via NPM (NPM is a package management tool that’s included with Node.JS): Architecture | XO documentation (xen-orchestra.com)
This CLI tool has the capability to export information about the environment with commands such as xo-cli list-objects.
These commands can capture VM configuration info not captured via in-guest backups (IP addresses/CPU/Memory/attached disks/network IDs, etc.), and the output data can be saved to JSON files. This JSON configuration information can be copied to the Veeam server and imported into Powershell to automate Veeam backup setup and assist with the recovery of lost VMs.
An Example of how this can be used is to run the following on a Linux server with the xo-cli installed:
These files could be stored on a network share the Veeam Backup Server can access, or a Veeam File Copy job can be used to schedule copying the latest file to the Veeam Backup Server to be imported by a Powershell script using Veeam’s cmdlets.
The following is an example of how to parse the data from one of the above files to use later to automate the creation of protection groups or restore VM disks to the right Storage Repository on the Xen server:
Veeam Recovery Options
Manual Bare-Metal Recovery
- After you’ve taken backups, you can create the Recovery Media through Veeam Backup & Replication Console and upload it to Xen Orchestra:

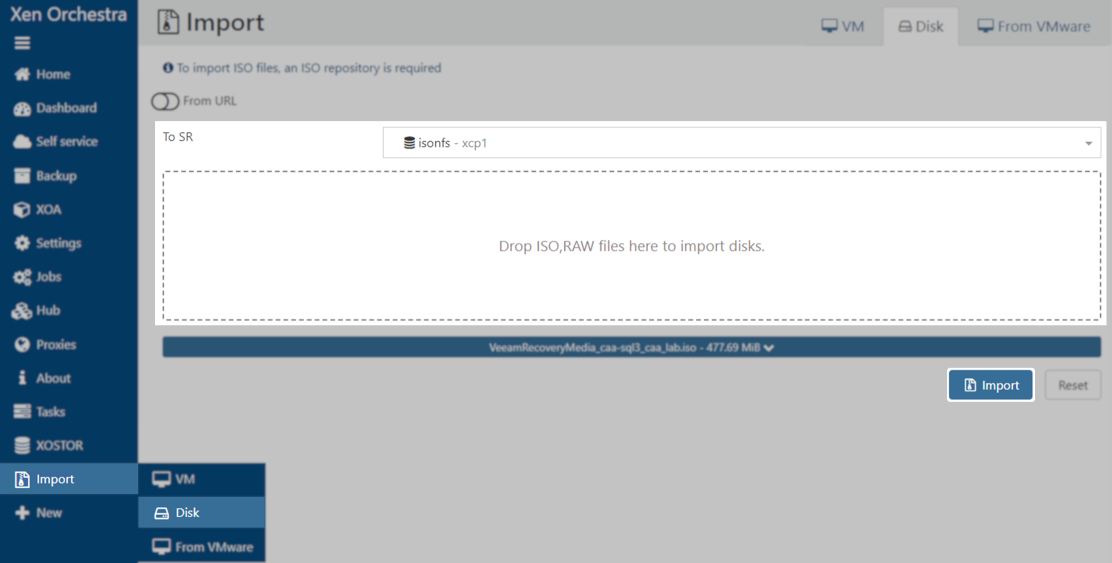
- Upload Recovery ISO to the ISO storage repository:

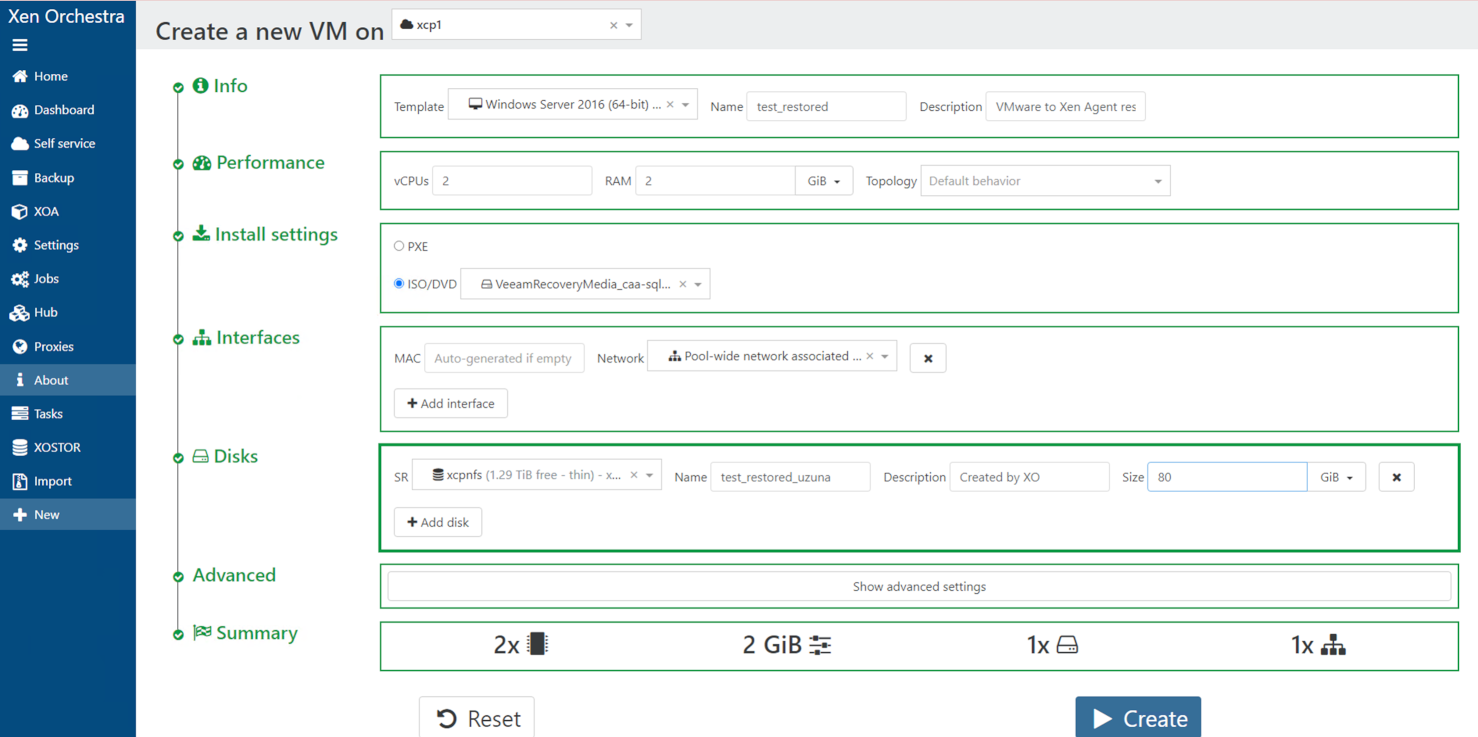
- Create a new VM to boot the recovery iso.

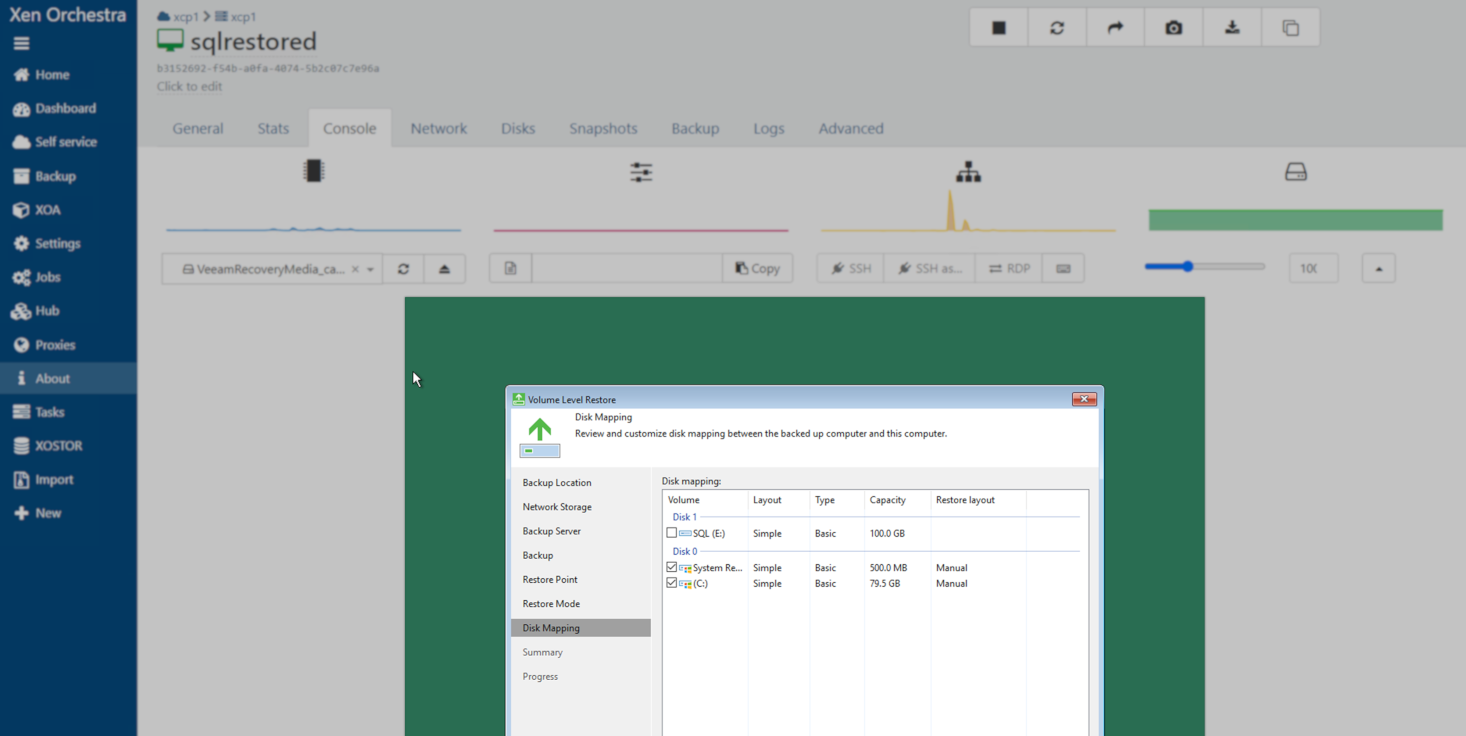
- Configure networking, connect to the backup server, select server backup/restore point, and disk mapping.

The full list of steps to go through the Bare-Metal Recovery wizard can be found below.
Note: You may have to Manually Map volumes to the Disks.
- Windows Recovery Media: Restoring from Veeam Recovery Media - Veeam Agent for Microsoft Windows Guide
- Linux Recovery Media: Restoring from Veeam Recovery Media - Veeam Agent for Linux User Guide
Enhanced Bare-metal Recovery
You can enhance the Bare-Metal Recovery method by leveraging the data collected via the xo-cli or xe commands from a host to recreate VMs based on previously exported data and attaching the Veeam Recovery ISO generated from the Veeam console and uploading it to Xen Orchestra.
The restore command should look something like this example:
You’ll need the following:
- Replace the name for the <VMname_restore>
- Template ID, which can be found with the following command:
xo-cli list-objects type=VM-template |grep "testvmcli" -A 40
- ID of the network, which can be found by matching network information with the VIF of the VM.
- Name for the restored virtual disk.
- ID of the Storage Repository, which can be found from the VDI files.
- Size of the Virtual Diskcan, which can be found from the VDI files.
Other Restore Options
Veeam Agents have several restore options available, including:
- Application Item Recovery (Microsoft Active Directory, SQL, Exchange, SharePoint, Oracle Database, etc)
- File Level Recovery for Windows, Linux, and other operating systems.
- Volume Recovery, which can restore non-OS volumes to a previous restore point
- Bare-metal Recovery: Using a Recovery ISO to restore to an empty VM/Physical server
- Exporting Volumes as Virtual Disks, including VHD, which is the default virtual disk type for XenServer and XCP-NG.
By adding one of the physical hypervisor servers as a managed Linux machine, the Export as virtual disk feature allows you to directly export a disk/volume as a VHD that can be restored to the Storage Repository location, such as an NFS share. The mount path for SR’s is: /run/sr-mount/<SR_UUID>, and the UUID can be found from the scripts exported previously.
After the disk is restored, it will need to be renamed by generating a new UUID on the Xen server and using a mv command to replace Veeam name with the new UUID. Example from the SR path:
Additional Information
If you are restoring into XCP-NG/XenServer from other platforms, make sure to install the appropriate Xen guest tools to improve performance and allow the platform to monitor the OS. XenServer and XCP-ng both have an offering: VM | XCP-ng documentation, XenServer VM Tools for Windows | Citrix Hypervisor 8.2
To report a typo on this page, highlight the typo with your mouse and press CTRL + Enter.
Spelling error in text
KB Feedback/Suggestion
This form is only for KB Feedback/Suggestions, if you need help with the software open a support case