- Veeam Support Knowledge Base
- How to manually remove restore points from a VMware Replica
How to manually remove restore points from a VMware Replica
Get weekly article updates
Cheers for trusting us with the spot in your mailbox!
Now you’re less likely to miss what’s been brewing in our knowledge base with this weekly digest
Oops! Something went wrong.
Please, try again later.
Purpose
This article documents how to remove restore points from a Veeam Backup & Replication replica in a vSphere environment.
The replica must be in a state where:
- the latest run was successful
- the job is not currently running
- failover is not currently active.
Solution
Remove old restore points (Manually enforcing retention)
- Manage snapshots for the Replica
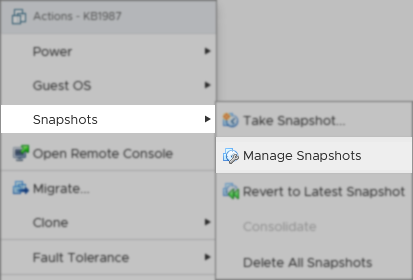
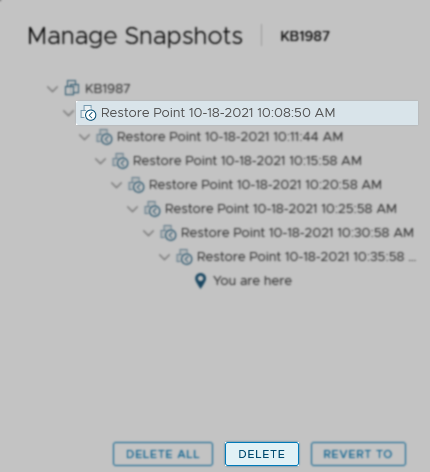
- Select the oldest snapshot and delete it.
Repeat this step as needed, always removing the oldest snapshot until you have the number of restore points desired.
Warning: Never remove the last two snapshots above the “You are here”. Doing so resets the replica and forces it to perform “Calculating digests” for each hard disk, which is a lengthy process.
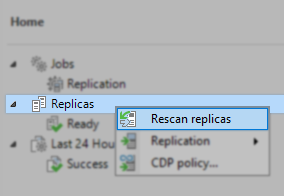
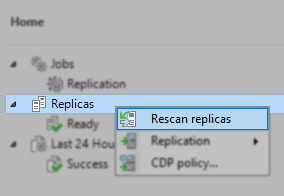
- Within Veeam Backup & Replication, right-click Replicas, and select “Rescan replicas.”
- Run the job as usual.
Remove recent restore points
- Manage snapshots for the Replica
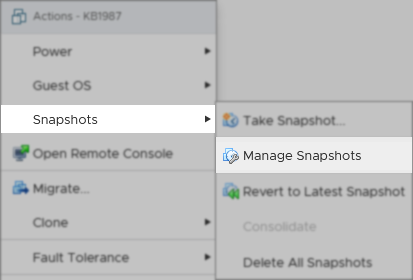
- Select the snapshot prior to those you’d like to remove, then click “Revert to.”
Example: Removing all restore points created after 10:15th.
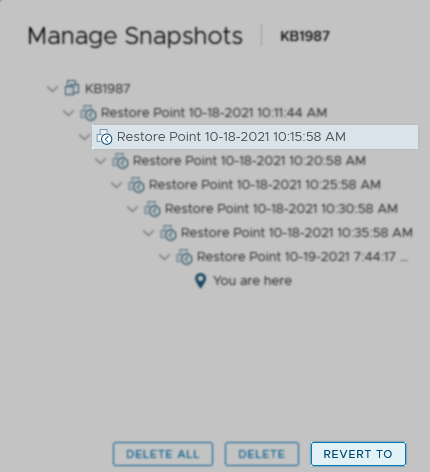
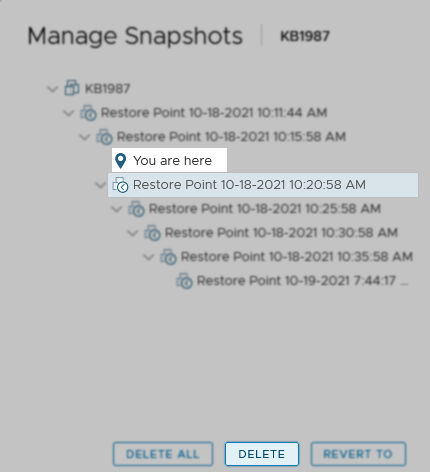
- After the revert completes, and the “You are here” moves to below the selected snapshot, select each of the restore points below the “You are here” and delete all of them.
- Within Veeam Backup & Replication, right-click Replicas, and select “Rescan replicas.”
- Run the job as usual.
To submit feedback regarding this article, please click this link: Send Article Feedback
To report a typo on this page, highlight the typo with your mouse and press CTRL + Enter.
To report a typo on this page, highlight the typo with your mouse and press CTRL + Enter.
Spelling error in text
Thank you!
Your feedback has been received and will be reviewed.
Oops! Something went wrong.
Please, try again later.
You have selected too large block!
Please try select less.
KB Feedback/Suggestion
This form is only for KB Feedback/Suggestions, if you need help with the software open a support case
Verify your email to continue your product download
We've sent a verification code to:
An email with a verification code was just sent to
Didn't receive the code? Click to resend in sec
Didn't receive the code? Click to resend
Start using Veeam:
Download the product
&
Activate the license key
Thank you!
Your feedback has been received and will be reviewed.
Oops! Something went wrong.
Please, try again later.