- Veeam Support Knowledge Base
- How to manually test hotadd functionality
How to manually test hotadd functionality
Cheers for trusting us with the spot in your mailbox!
Now you’re less likely to miss what’s been brewing in our knowledge base with this weekly digest
Oops! Something went wrong.
Please, try again later.
Purpose
Solution
- Before testing, review Virtual Appliance (HOTADD) Requirements and Limitations
- Review KB1054:Appliance Mode (Hotadd) Requirements and Troubleshooting
- The backup proxy and processed VMs must reside in the same vSphere Datacenter. Manual hotadd of disks from different datacenters may succeed, but hotadd backups will not work if the VM and proxy are not in the same datacenter.
How to Test
Performing the following steps will help determine if the infrastructure is present to allow the Proxy to attach the disks of the VM to be processed using hotadd. It is advised to do this with a VM during off-peak hours as it requires a snapshot on the production server.
Note: Remember to review the cleanup section after performing the test.
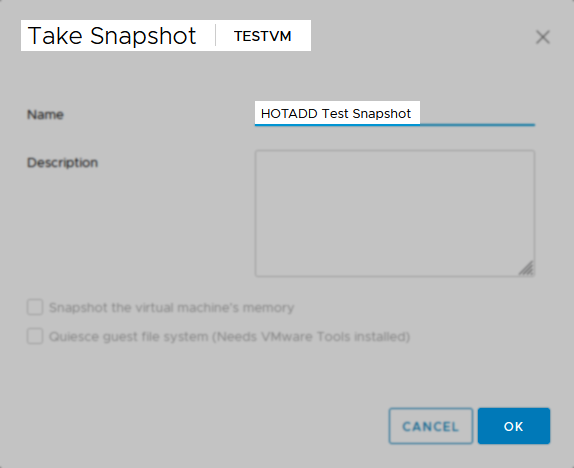
- Create a snapshot on the VM to be processed by Veeam Backup & Replication.
- Within a vSphere client, attach the base disk from the VM in Step 1 to the Veeam Proxy.
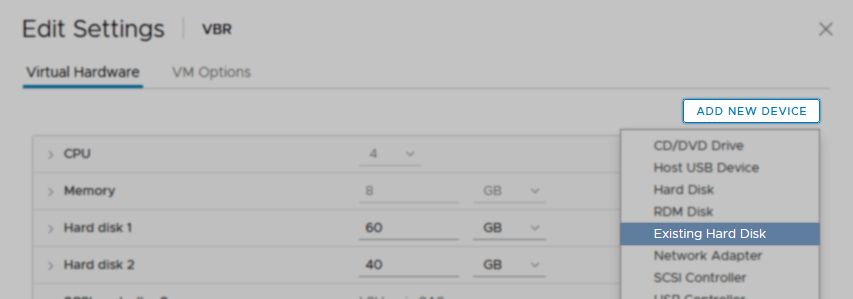
- Edit the Veeam Proxy that will be processing the VM from Step 1.
- Click [ Add New Device ]
- Chose “Existing Hard Disk”
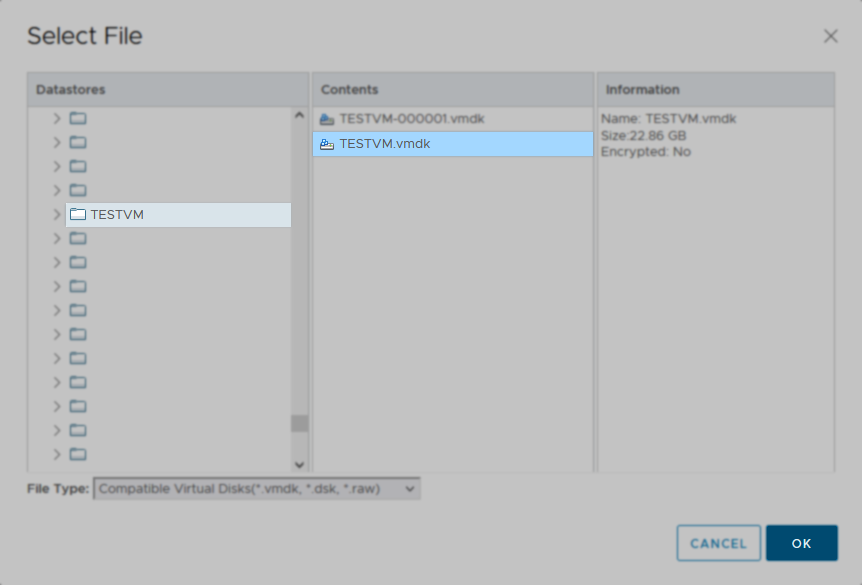
- Navigate to the location of the base disk from the VM in step 1.
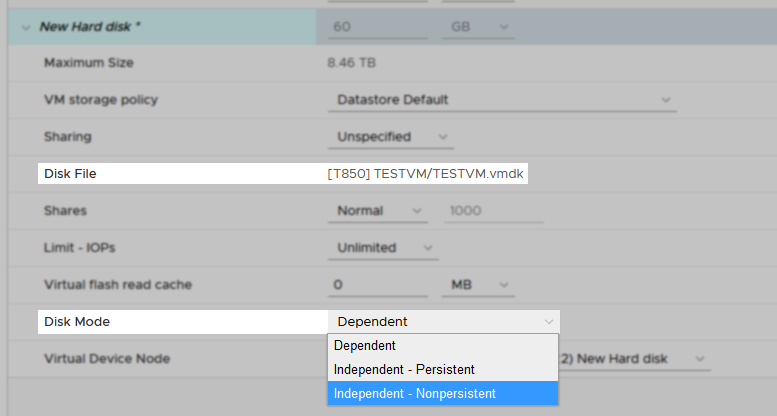
- After selecting the disk, expand the disk node.
- Under "Disk Mode" select to "Independent - Nonpersistent"
- Click [ Ok ]
Analyzing the results:
- If the "Reconfigure virtual machine" task completes and the disk is now attached to the proxy, this means the infrastructure is present to allow the Proxy to hotadd the VMs base disk. Proceed to the Cleanup section below.
- If you were unable to select the base disk (VMDK) from the datastore because the datastore was not visible to be browsed, then this means the proxy you were testing with does not have access to that datastore.
- If the task failed, it may be a permissions-related issue that prevented the account you are using from completing the disk attach task. Test again with the account configured within Veeam Backup & Replication to access the VMware environment. If permissions issues still occur check permissions assigned to the account.
- There are many other reasons why this task could fail, if it has failed and you would like assistance, please open a support case, and a Veeam Support Engineer will be happy to assist you.
Cleanup after test
After you have completed testing, follow these steps to clean up the environment.
- If you were able to attach the VM's disk to the Proxy, detach it.
- Edit the Veeam Proxy used in the testing.
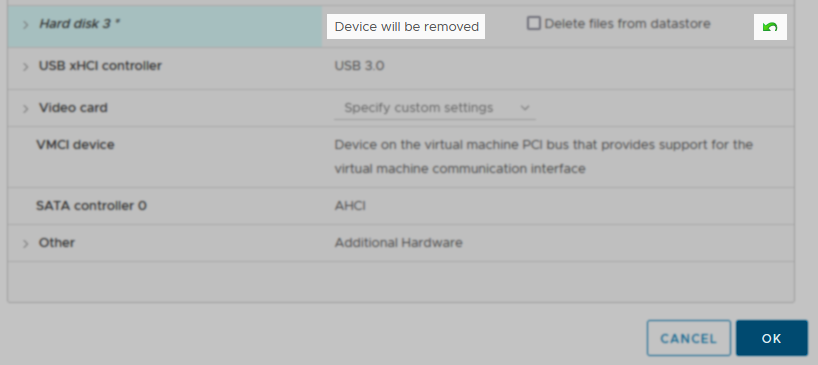
- Hover over the disk that was attached during testing.
Note: If you are unsure which disk needs to be detached from the Proxy, check the disk's file path, it should contain the name of the production server from which it is from. - Click the ( X ), which will turn into a green arrow indicating that the disk will be released.
(DO NOT select the option to "Delete files from datastore") - Click [ Ok ] to release the disk(s) from the Proxy.

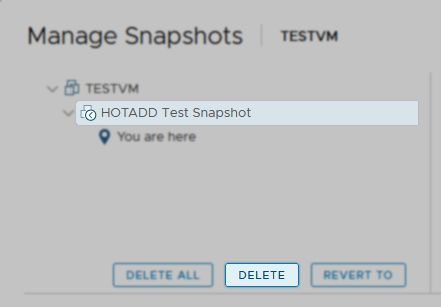
- Remove the snapshot created on the production server during testing.
To report a typo on this page, highlight the typo with your mouse and press CTRL + Enter.
Spelling error in text
Thank you!
Your feedback has been received and will be reviewed.
Oops! Something went wrong.
Please, try again later.
You have selected too large block!
Please try select less.
KB Feedback/Suggestion
This form is only for KB Feedback/Suggestions, if you need help with the software open a support case
Thank you!
Your feedback has been received and will be reviewed.
Oops! Something went wrong.
Please, try again later.