Virtualization isn’t famous just because of the easier management of backup and restore procedures compared to those for physical systems. It has other advantages, and one of them is definitely VM’s High Availability (HA). The term means that VMs should be available, regardless of the availability of the physical host it is running at. There are some specific methods for ensuring HA of the VMs. Specifically, I’d like to talk about failover clustering, which is Microsoft’s native feature for Windows Server with a Hyper-V role enabled.
What is Hyper-V failover cluster?
Failover cluster is a set of several similar Hyper-V servers (called nodes), which can be specifically configured to work together, so that one node can take the load (VMs, services, processes) if another one goes down or if there is a disaster. Sounds cool, right?
Moreover, the process of migration from one node to another can be done manually by a system admin when he wants to test a planned failover or automatically by a failover cluster service if there is an unexpected disaster (unplanned failover).
However, admins should know that unplanned failover doesn’t provide the VM with zero downtime: VMs will be unavailable for a few seconds, which is necessary so the failover service realizes the case of disaster and is able to maintain the failover itself. This is still considered as High Availability option because it takes less time to be executed compared to a physical server environment, where you would need to wait until the whole server is repaired.
Last but not least, Hyper-V failover clustering has perfect scalability. Once you have another server that you’re willing to add to the system, it won’t require difficult reconfigurations or any downtime, and it will be added to the cluster easily on the fly with the help of a system wizard.
If you’re interested in the technology, don’t forget to check a list of requirements and limitations before you go ahead and attempt to deploy it.
Requirements
Hardware
Shared storage: The most important thing here is to have shared storage as a starting point. Since VM disks will not be moved to different storage, your storage should be able to work simultaneously with multiple hosts and provide them with read and write access. Examples of this idea are a low-cost NAS device, an expensive Storage Area Network (SAN) or even a Windows Server with an iSCSI target. For Windows Server 2012 and later, you can also use SMB 3.0 file shares as shared storage. To learn more about this option, use the Deploy Hyper-V over SMB guide.
Note: Shared storage is, in this case, still a single point of failure. Because you don’t have a redundant spare storage, you’re still vulnerable when something happens to your storage. So, don’t consider failover cluster as a panacea for all disasters.
CPU with native virtualization support: Yes, in 2014 it’s rare to find business CPU without this support. However, it’s still wise to double-check that. You should check the following features: VT for Intel CPUs and AMD-V for AMD ones. Please note, there is no reason to attempt building failover cluster in a mixed environment. Either Intel or AMD. Period.
Using chips from different CPU families, even from the same company, will also end up decreasing your chances to make the technology work. The best practice is to use identical chips.
Networking: Besides connection to the shared storage, nodes should be interconnected with each other by some network. Regardless of whether you use a TCP/IP or iSCSI connection, the best practice is to separate this traffic from your production site.
See a full list of hardware requirements for Windows Server 2008 R2, for Windows Server 2012 and Windows Server 2012 R2.
Software
OS versions: If you’re using Windows Server 2008 R2, you’re eligible to try failover cluster when you have either an Enterprise or a Datacenter license. In Windows Server 2012 and Windows Server 2012 R2 the feature is available with Standard and Datacenter licenses. Besides that, those servers must have either a full installation or a Server Core one.
OS settings: From the settings point of view, servers should be joined to the same domain. In addition, they should have activated and installed Hyper-V and Failover Cluster roles with all dependences required within the installation.
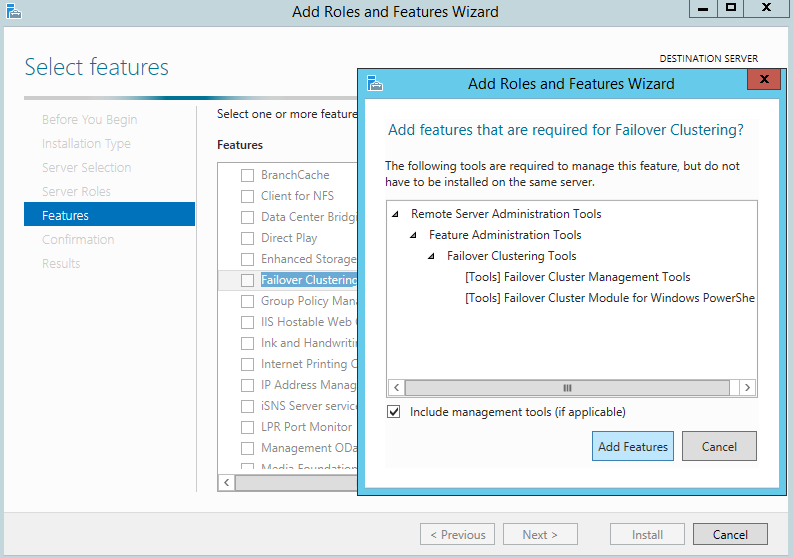
Figure 1. Adding the Failover Clustering feature to Windows Server 2012 R2
How to set Hyper-V Failover Cluster
So, you’ve checked every point above and made sure your environment is suitable for Hyper-V Failover Cluster, and you’re ready to try it out.
For the purpose of demonstration, I’ve set up a test lab of 2 Windows Server 2012 R2 servers with Hyper-V and Failover Cluster features installed. I joined them to the same domain and created a shared 10GB disk to use as the cluster shared volume (CSV). Then, I put a disk online on both nodes, initialized with GPT partitioning, created a simple NTFS partition for all 10GB and quick formatted it.
Note: Disk letter doesn’t have to be assigned and the ReFS file system can be used if both nodes are running on Windows Server 2012 R2.
As a starting point for any operation with your clusters, use the Failover Cluster Manager (FCM), which can be found easily via tools in Windows Server Manager.
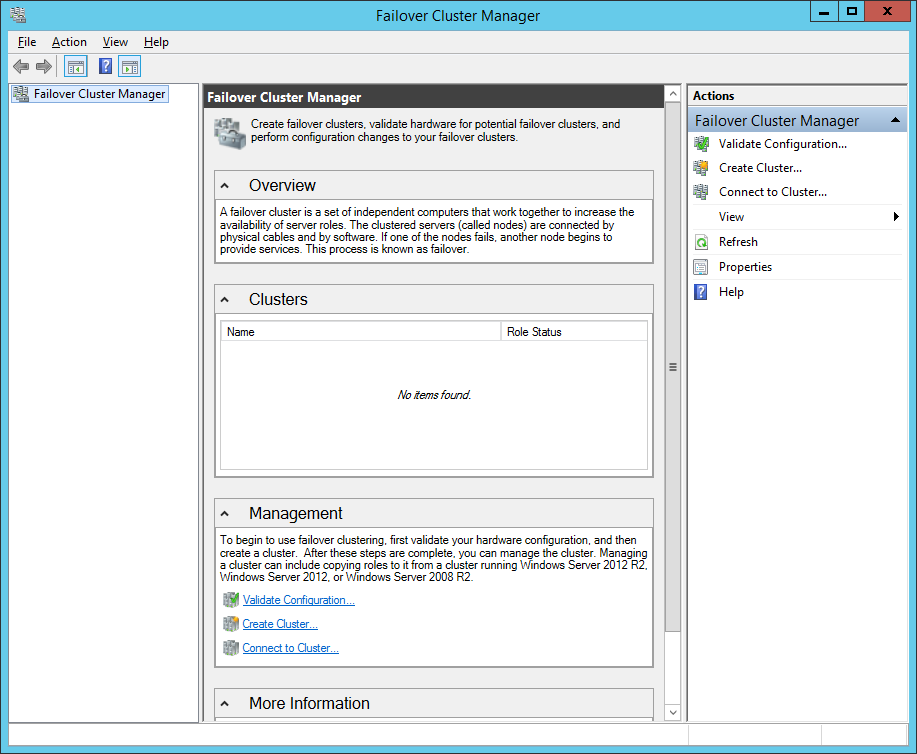
Figure 2. Failover Cluster Manager in Windows Server 2012 R2
The first thing you should do in FCM is running a cluster configuration validation. A simple wizard asks you to select servers (nodes) and testing options, and then it validates the configuration and gives you a detailed report of this validation.
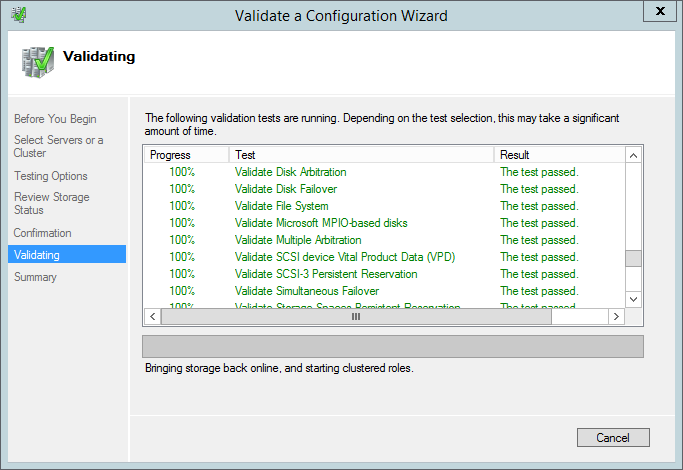
Figure 3. Validation of cluster configuration
If you got a green light from the validation wizard, you can proceed with cluster setup, selecting the appropriate wizard. The Create Cluster wizard is rather simple, and I doubt you will have any issue with its settings.
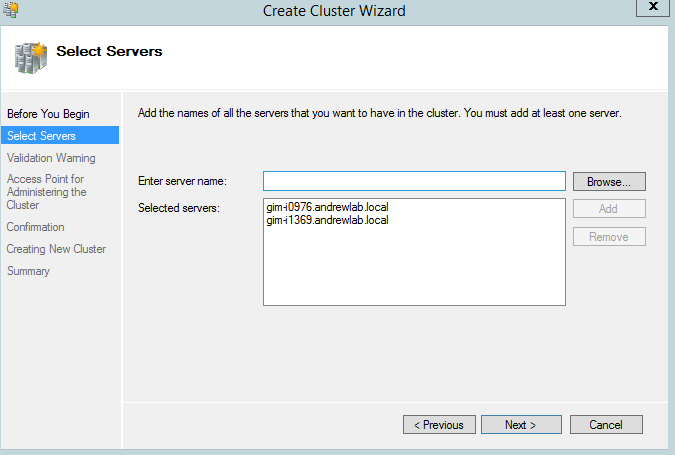
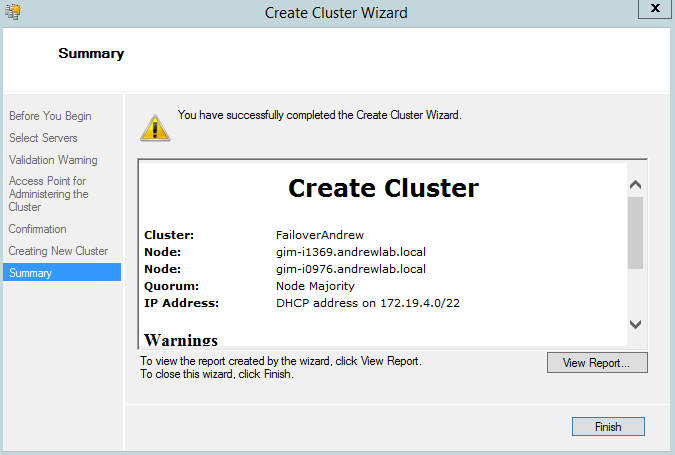
Figure 4,5. Create Failover Cluster wizard
It shouldn’t take long to create a cluster, and you’ll be presented shortly with the brand new failover cluster you’ve created. Click Connect to Cluster if it doesn’t happen automatically.

Figure 6. Failover Cluster Manager, connected to a cluster
At the same time, you can see a new object in your Active Directory, created for your failover cluster.
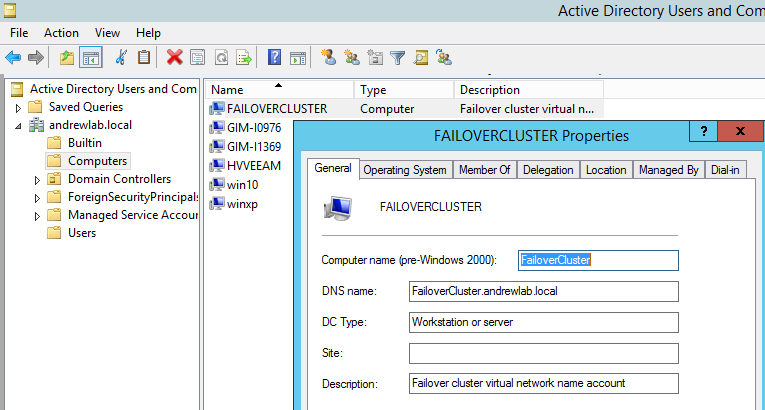
Figure 7. New object for Failover Cluster in AD
Going back to FCM, I’ve navigated to the storage – disks node and added a prepared-in-advance cluster disk to the cluster shared volumes. This changed the disk file system from NFS to CSVFS, so every node will be aware that a shared cluster is using this disk. At the same time, this disk was mounted to C:\ClusterStorage\Volume1 and showed up on both nodes in my cluster.
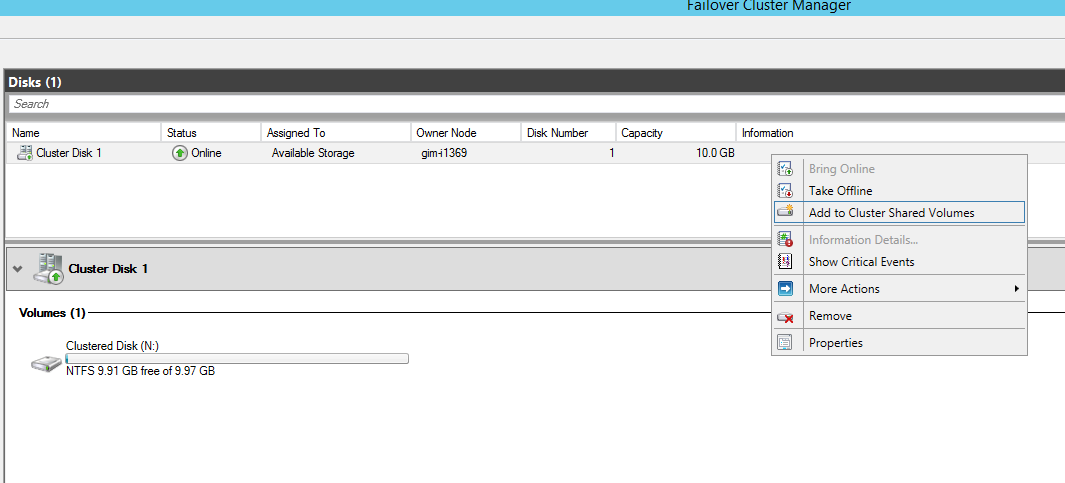
Figure 8. Failover Cluster manager – Add disk to CSV
Now, I can utilize the disk as a storage for my Hyper-V environment and create a VM on it. I believe I can omit describing this process and come back to the created VM.
Now, I have to make this VM highly available, which means that VM gets a configured “HA” role. You can easily do this via Roles – Configure role – Virtual Machine.
I’ll implement the settings, and the HA VM will appear in the Roles tab.
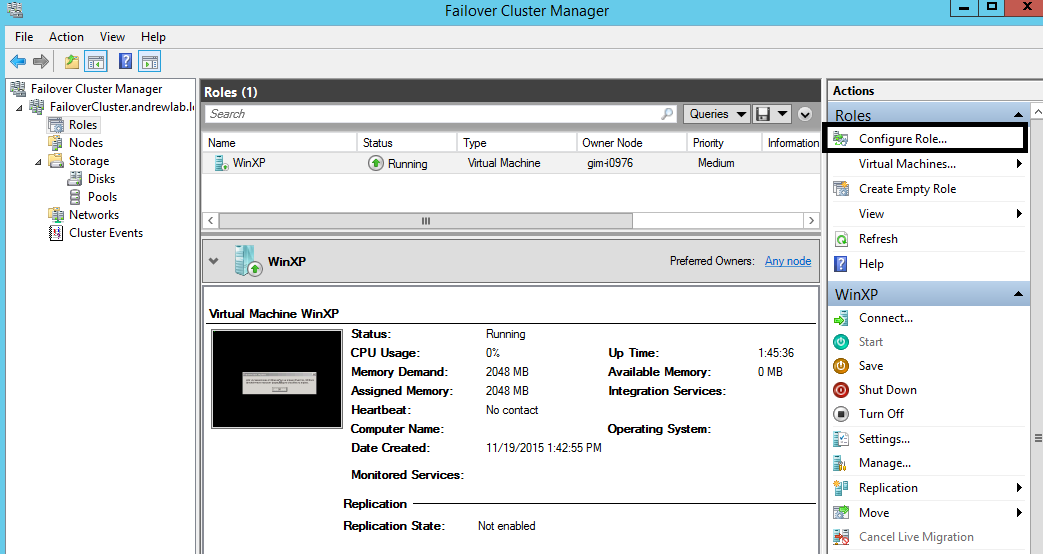
Figure 9. FCM, HA role is applied for “WinXP” VM
If everything went smoothly, congratulations! Your VM is now highly available and will be up and running, regardless of the server condition.
To prove it, you can test the VM migration. According to the terms, there are two types of live migration: The first one is when you do it by purpose — planned failover. The second one is when it happens accidentally — unplanned failover.
Planned failover is a piece of cake. Right-click on a VM, select Move – Live Migration – Select Node… The cluster migrates your VM to the selected node and changes the owner node value, so you understand what the current situation is and which node owns the VM at the moment.

Figure 10. Failover Cluster, planned failover
From the VM point of view, there will no disruption in the working scenario. All processes remain to work and the users working with them shouldn’t notice anything.
You can test unplanned failover by simply rebooting the owning node. Connect to FCM on a remaining node and see the migration process.
Additional information
Don’t forget to check the VM properties right from Failover Cluster Manager, because they contain some very important options you might want to adjust in advance, including options like preferred owning node, VM priority and ability to get failback once the broken node is restored.

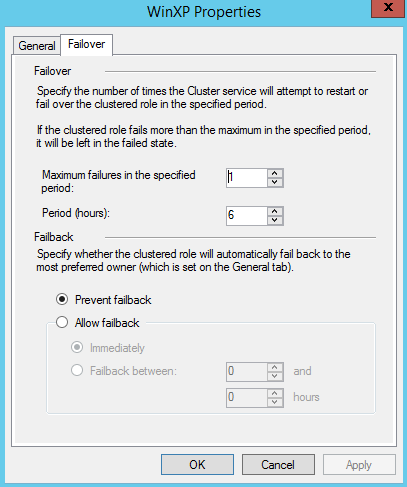
Figure 11. VM properties by FCM
That should be it, folks! Explore the power of High Availability and Hyper-V Failover Cluster. Let me know about your experience in the comments below.
See also:
- Veeam Agent for Microsoft Windows
- Cluster Shared Volumes inside out
- Using CSV in Failover Cluster
- Failover Cluster requirements
- Benefits of ReFS file system in Windows Server 2016
- Cluster Group Start Ordering on Windows Server 2016
- Veeam Community Forums: Backing up a Windows Failover Cluster with Shared Storage?